First, you must activate local currency payments for that specific Vendor.
Invoicing in local currency by Clients
Once clients have activated local currency payments and the vendor has added an international bank account, invoicing in local currency is available. Clients may only upload invoices, not make time tracker entries or write detailed invoices based on an agreed to Work Order.
Start by logging in to Liquid. Make sure your overall payment terms are set appropriately in Payment Methods before continuing.
- Once you are logged in, go to Invoices on the left side. The steps are the same as those for uploading Invoices on behalf of your Vendors.
- Press the + Invoice button.
- You will be prompted to select a Vendor. If you don’t see your Vendor on the list, you may choose to invite them.
- Then you will be prompted to select a Work Order. Note that the Work Order selected must be set in the foreign currency; if it is not, the invoice created from that Work Order will be in USD. If you don’t have an active Work Order with that Vendor, you will be prompted to Create Work Order. You will also be able to upload an invoice without a Work Order by clicking Create the invoice without it.
- Once you have selected an active Work Order or selected creating the invoice without a Work Order, then this will open a new page with the Vendor, Work Order name (if applicable), and payment terms pre-populated and not editable on the Upload Invoice page.
- Upload the file (acceptable file types are PDF, DOC, DOCX, or image files with a maximum size of 32MB).
- Then, enter the invoice details — Invoice number and Invoice total (total amount invoiced in the local currency). An invoice number will be pre-populated, but you should adjust this manually to match the actual invoice number from the Vendor’s invoice.
- You can also add an Invoice Period of Performance Start date, and an Invoice Period of Performance End Date. These fields are optional.
- Press Submit Invoice to complete the Invoice upload.

Once the Invoice has been uploaded, then you can pay the Invoice. At this time, you cannot schedule a foreign currency Invoice for future payment. In addition, once an Invoice is created in a currency, it can’t be changed to another.
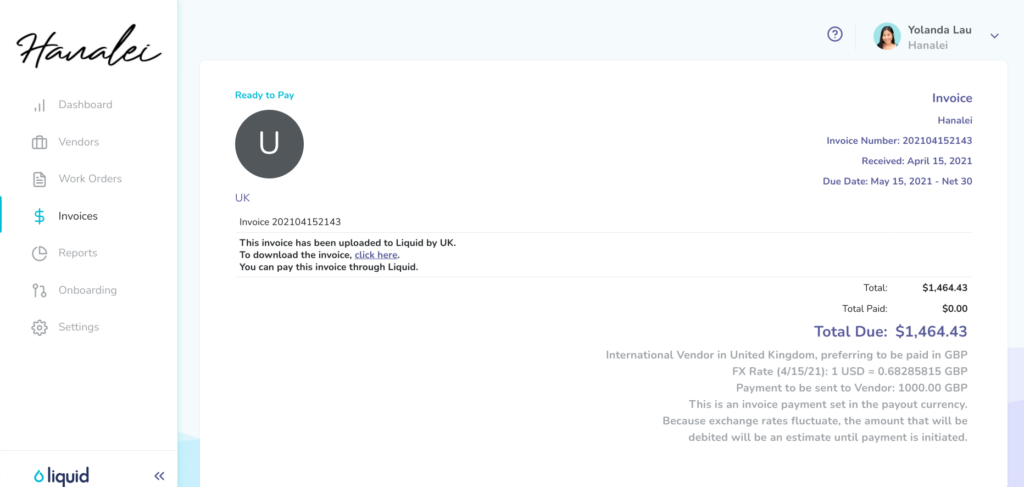
Prior to the client paying the invoice, an estimated USD amount will be shown, along with the FX rate. At the time the payment is made, the USD amount will be locked given the invoice amount in local currency and the FX rate at that time.